Mastering the Art of Crafting Your Own Vintage Costume: A Step-by-Step Guide
Understanding Vintage Aesthetics: Exploring the Appeal of Different Eras
Vintage aesthetics have long captivated people with their nostalgic charm and timeless beauty. Each era carries its own distinctive design elements, fashion statements, and cultural influences that contribute to its appeal. From the roaring 1920’s to the retro-futurism of the 1980’s, vintage aesthetics offer a glimpse into the past while influencing contemporary style.
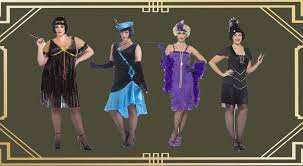
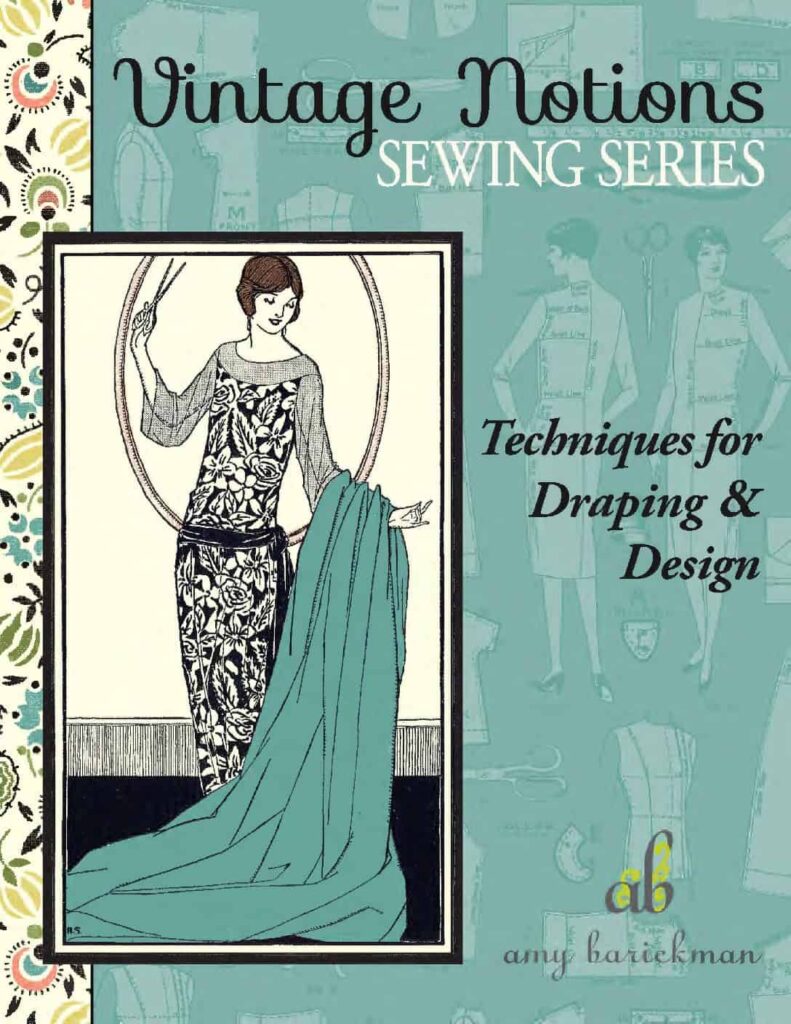
The 1920’s: Glamour and Art Deco – The 1920’s were marked by the opulence of the Art Deco movement, featuring geometric patterns, luxurious materials, and bold color contrasts. Flapper fashion, characterized by beaded dresses, cloche hats, and bobbed hairstyles, symbolized a break from tradition and the emergence of modernity. Here are some examples of Art Deco textiles and motifs you may consider online.
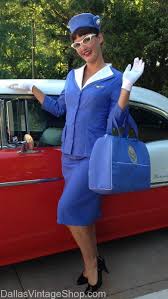
The 1950’s: Elegance and Optimism – The post-war 1950’s celebrated prosperity and a return to traditional values. Fashion embraced cinched waists, full skirts, and pastel colors, while interior design featured sleek furniture, atomic-age motifs, and pastel-hued appliances. This era’s vintage appeal lies in its polished, wholesome aesthetic. Retro 1950’s fabrics and details are sought online through Etsy today.
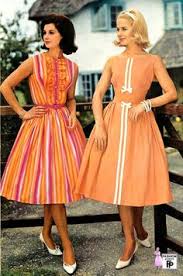
The 1960’s: Bold and Revolutionary – The 1960’s brought a cultural revolution reflected in its aesthetic choices. Mod fashion, with its shift dresses, go-go boots, and psychedelic prints, captured the spirit of change. Graphic design incorporated bright colors and abstract shapes, while music and art movements like pop art further cemented the era’s impact. Assorted 1960’s materials are located online – look through the designs here.
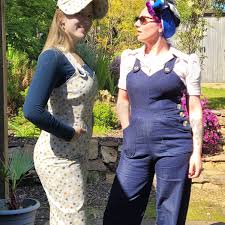
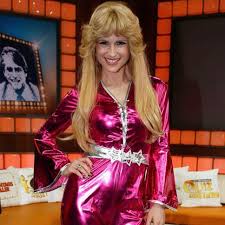
The 1970’s: Bohemian and Earthy – Defined by a relaxed and eclectic style, the 1970’s vintage aesthetic embraced earthy tones, natural fabrics, and a free-spirited approach to fashion. Bell-bottom jeans, peasant blouses, and macramé decor were hallmarks of this era, reflecting a connection to nature and counter-cultural movements. Some wild and psychedelic prints are found at Etsy – learn more today.
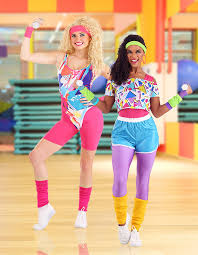
The 1980’s: Retro-Futurism and Maximalism – The 1980’s were all about excess and innovation. Bright neon colors, oversized silhouettes, and technological influences defined both fashion and interior design. Synthwave music and digital art evoked a sense of futuristic nostalgia, while arcade culture and early computing shaped the aesthetic of the time. Bold or floral 80’s prints are located through Etsy today.
The Everlasting Influence of Vintage Styles – Each of these eras continues to inspire modern aesthetics, from fashion and interior design to music and media. The cyclical nature of trends ensures that vintage elements are continually reinterpreted, blending the past with contemporary sensibilities. Whether through a 1920’s-inspired evening gown or a 1980’s neon-lit room, vintage aesthetics remain a timeless source of creativity and expression.
Selecting the Perfect Theme for your Handmade Costume
Creating a handmade costume is an exciting and rewarding process, allowing for personal expression and creativity. However, choosing the right theme is crucial to achieving the desired look and impact. Whether for a cosplay event, Halloween party, or themed gathering, selecting the perfect theme requires careful consideration of personal interests, available materials, and the level of detail you wish to incorporate.
*Consider Your Interests and Passions
Start by identifying themes that resonate with you. Are you a fan of historical fashion, fantasy worlds, or classic cinema? Selecting a theme that aligns with your interests will make the crafting process more enjoyable and engaging for you.
*Evaluate Skill Level and Time Commitment
Some costume themes require intricate designs and advanced crafting techniques, while others can be achieved with simple sewing and embellishments. Be realistic about your skills and the time available before committing to a complex project.
*Research and Gather Inspiration
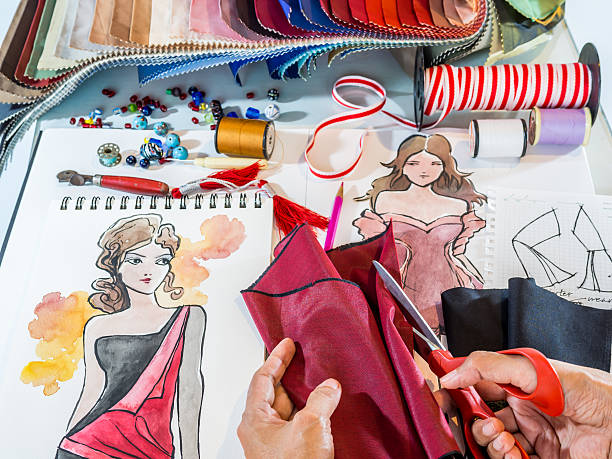
Look for references and inspiration online, in movies, or from historical sources. Creating a vision board or sketching out ideas can help refine your concept and ensure all elements come together cohesively.
*Consider Budget and Material Availability
Handmade costumes can be as affordable or extravagant as you choose. Check the availability of fabrics, accessories, and embellishments before finalizing your theme. Repurposing existing materials can also add a unique touch while keeping costs low.
*Think About Practicality and Comfort
While aesthetics are important, comfort should not be overlooked. If you’ll be wearing the costume for an extended period, consider fit, mobility, breathability, and ease of movement when designing your outfit.
*Add Unique and Personal Touches
A handmade costume allows for complete customization. Consider adding personal flair, such as hand-painted details, custom embroidery, or accessories such as feathers, that make the costume truly one-of-a-kind.
*Test and Make Adjustments
Before the final event, do a test run of your costume to check for any fit issues or adjustments needed. This will ensure confidence and comfort when wearing it.
By carefully selecting a theme that matches your interests, skills, and resources, you can create a stunning handmade costume that showcases your creativity and craftsmanship.

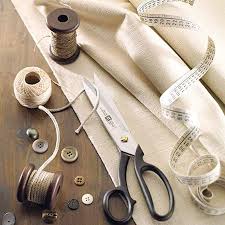
Materials Matter: Selecting the Right Fabrics and Accessories for Authenticity
Materials Matter: Selecting the Right Fabrics and Accessories for Authenticity
When creating a handmade costume, selecting the right materials is essential for achieving an authentic and polished look. The choice of fabrics and accessories can significantly impact the accuracy, comfort, and overall presentation of your design. Here’s how to choose materials that will enhance your costume and bring your vision to life.
#Research Your Era or Theme
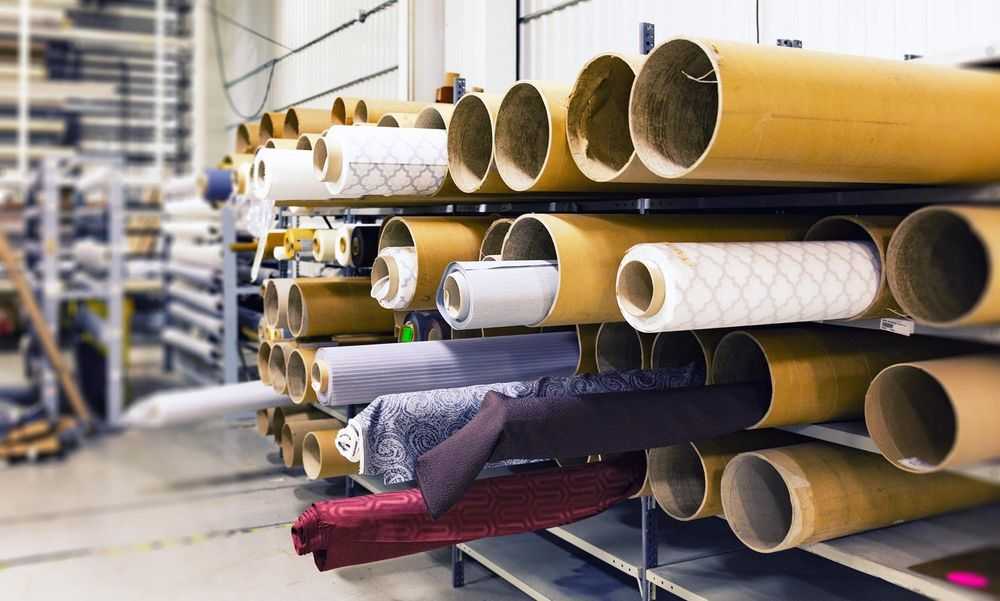
Different historical periods and fantasy genres have distinct fabric choices and textures. For example, medieval costumes often feature linen, wool, and brocade, while a 1920’s flapper dress would require silk, chiffon or fringe detailing. Understanding these materials ensures historical or thematic accuracy. A vast selection of heavy fabric styles in assorted designs – look through these online today.
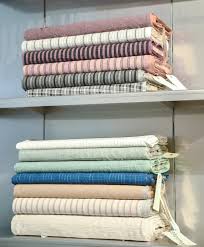
#Choose Fabrics Based on Appearance and Functionality
Select fabrics that not only look the part but also provide comfort and durability. Natural fibers like cotton, wool, and silk offer breathability and a rich texture, while synthetic materials like polyester can provide an affordable alternative with easier maintenance. Consider how the fabric will drape, stretch, or layer to achieve the right silhouette. Beautiful sheer fabrics are located online today – search these for your desired look now.
#Prioritize Quality Over Convenience
While budget-friendly options may be tempting, investing in high-quality fabrics can make a significant difference in the final look of your costume. Authentic textiles often add depth and realism that mass-produced fabrics lack. Budget fabric options available online as an alternative which can suffice a certain costume style – look through these online.
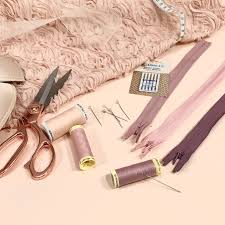
#Incorporate Appropriate Accessories
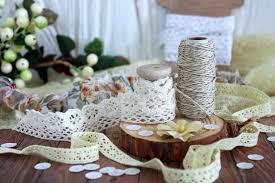
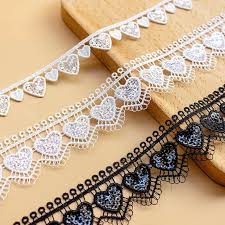
Accessories complete the costume and add authenticity. Leather belts, lace trims, metal clasps, and hand-stitched embellishments enhance the period accuracy and detail of your outfit. Pay attention to historically accurate closures, such as buttons, ties, or hooks instead of zippers, for pre-modern styles. Assorted lace and leather trims as well as motifs are sourced online through Etsy today.
#Consider Comfort and Wearability
A costume may look stunning, but if it’s uncomfortable, it will be uncomfortable to wear for extended periods. Lining delicate fabrics, adding adjustable closures, and choosing breathable materials can make your outfit both stylish and practical.
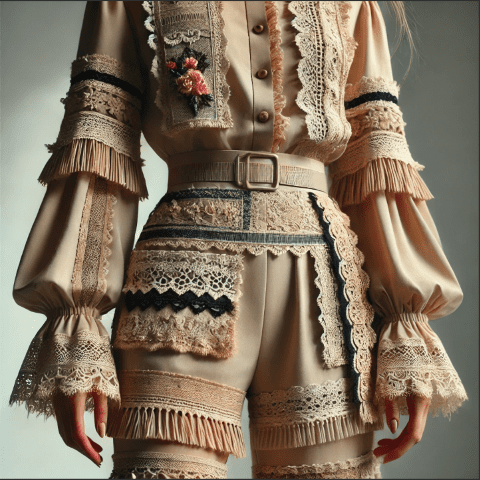
#Experiment with Textures and Layers
Layering different materials adds depth and realism to a costume. Combining rough textiles with smooth fabrics or heavy materials with light ones can create an eye-catching and historically accurate effect. This is evident in Steampunk costumes.
#Test Your Materials Before Finalizing
Before committing to a fabric or accessory, do a small test to check its flexibility, durability, and how it interacts with other elements of your costume. This can help avoid last-minute issues and ensure the best possible final result. You may purchase a sample strip of fabric – if from a physical store, and sometimes online stores offer this option as well.
By carefully selecting fabrics and accessories that align with your costume’s theme and practical needs, you can create a striking and authentic handmade costume that stands out.
As an affiliate - I may receive a small commission when you click on a link and purchase through this site
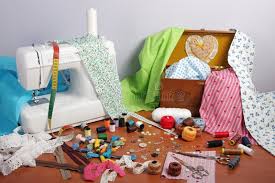
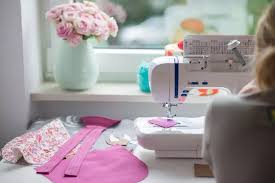
Tools of the Trade: Essential Supplies for Sewing and Embellishing Your Costume
Creating a handmade costume requires the right tools to bring your vision to life. Whether you’re sewing, crafting, or adding intricate details, having the proper supplies can make the process smoother and more enjoyable. Here’s a guide to the essential tools you need for sewing and embellishing your costume.
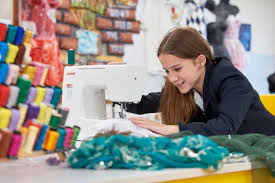
1. Sewing Essentials
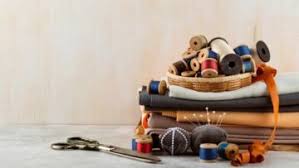
A well-equipped sewing kit is the foundation of any costume-making project. Key items include:
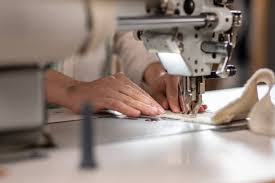
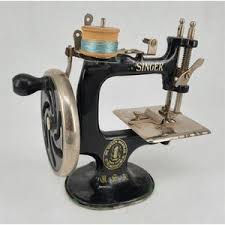
- Sewing Machine – Speeds up the process and ensures strong, even stitches. An overlocker is a handy tool if you want a really finished look to the seams. Varied sewing machines are located online through Amazon
- Hand Sewing Needles – Useful for delicate details, buttons, and finishing touches. Various needles for hand-sewing available here.
- Thread – Match colors to your fabric; consider strong polyester or silk thread for durability. Many threads to suit all colours available here online at Amazon.
- Fabric Scissors or Rotary Cutter – Sharp tools ensure precise cuts and clean edges. Look at this selection today.
- Seam Ripper – Also called “stitch unpick” helps correct mistakes without damaging fabric. Find yours here.
- Measuring Tape & Rulers – Ensure accurate sizing and proportions. Pick up one today, with these online.
- Pins & Clips – Hold fabric in place while sewing. Something for everyone right here – choose yours today.
2. Fabric Preparation & Cutting Tools
To work with different textiles effectively, you’ll need:
- Self-Healing Cutting Mat – Protects surfaces and allows clean cuts, or an unused dining table will suffice, if required. Mats of all shapes and styles located here at Amazon.
- Chalk, Fabric Markers, or Tailor’s Pencil – Mark patterns without damaging fabric. Big selection right here – choose yours today.
- Iron & Ironing Board – Pressing seams and fabric ensures a polished, professional look. This can include a sleeve arm, which is a great way to press sleeves and trouser legs. Irons, ironing boards and steamers available right here online.
3. Embellishment Supplies
Details make a costume stand out, so consider these tools for decoration:
- Beads, Sequins, & Rhinestones – Add sparkle and dimension. These items are all located online through Amazon – locate yours now.
- Embroidery Thread & Needles – Create intricate designs and textures. Available online today at Amazon.
- Fabric Paint & Dyes – Customize colors and patterns. All your dying needs covered – shop today.
- Appliqués & Patches – Enhance costumes with decorative elements. Search for your perfect patch here.
- Glue Gun & Fabric Glue – Secure embellishments when sewing isn’t an option. Great for using on accessories such as hats and bags. Hot glue guns and glues are bought here today.
4. Fasteners & Structural Elements
Costumes often require closures and shaping tools, such as:
- Zippers, Hooks & Eyes, Snaps, and Velcro – Keep costumes secure and functional. A selection of assorted closures are located here at Amazon.
- Boning & Corset Supplies – Essential for structured garments. These are located here for your convenience.
- Elastic & Bias Tape – Provide flexibility and clean edges. You can find these right here online. And elastic right here also online.
5. Specialty Tools for Advanced Crafting
For those who love intricate designs and craftsmanship:
- Leather Punch & Grommet Setter – Useful for armor and accessories. Selections of each located through Amazon online.
- Heat Gun – Shapes materials like foam or thermoplastics. Tools such as heat guns are found here today.
- Soldering Iron or Wood Burner – Creates detailed engravings or distressing effects. Technical details such as these are located at Amazon – find yours now. Also include a cigarette lighter – which seals or cinges ends of ribbon or frayed fabric like brocade – used with caution. You will find a big selection of these right here.
6. Organization & Workstation Setup
A clutter-free workspace increases efficiency:
- Storage Bins & Thread Racks – Keep materials accessible and tidy. Your storage needs answered online.
- Good Lighting – Essential for detailed work. Assorted hobby and desk lamps are bought here today.
- Dress Form or Mannequin – Helps with fitting and draping fabric. Mannequins of all styles available today at Amazon.
By investing in these essential tools, you’ll set yourself up for success in costume creation. With the right supplies, your handmade costume can achieve the perfect balance of craftsmanship, comfort, and creativity.
Step-by-Step Sewing Guide: From Pattern Selection to Final Stitch
Sewing a handmade costume is a rewarding process that requires careful planning, precision, and creativity. Whether you’re a beginner or an experienced sewer, following a structured approach ensures a well-crafted final product. Scroll through these vintage patterns online today. Here’s a step-by-step guide to take you from pattern selection to the final stitch.
1. Choose Your Pattern
Selecting the right pattern is the foundation of your project. Consider:
- Skill Level – Pick a pattern suited to your sewing expertise.
- Accuracy – Choose a historically or thematically accurate design.
- Fit & Size – Ensure the pattern aligns with your body measurements.
- Adjustability – Look for patterns with customization options if needed.
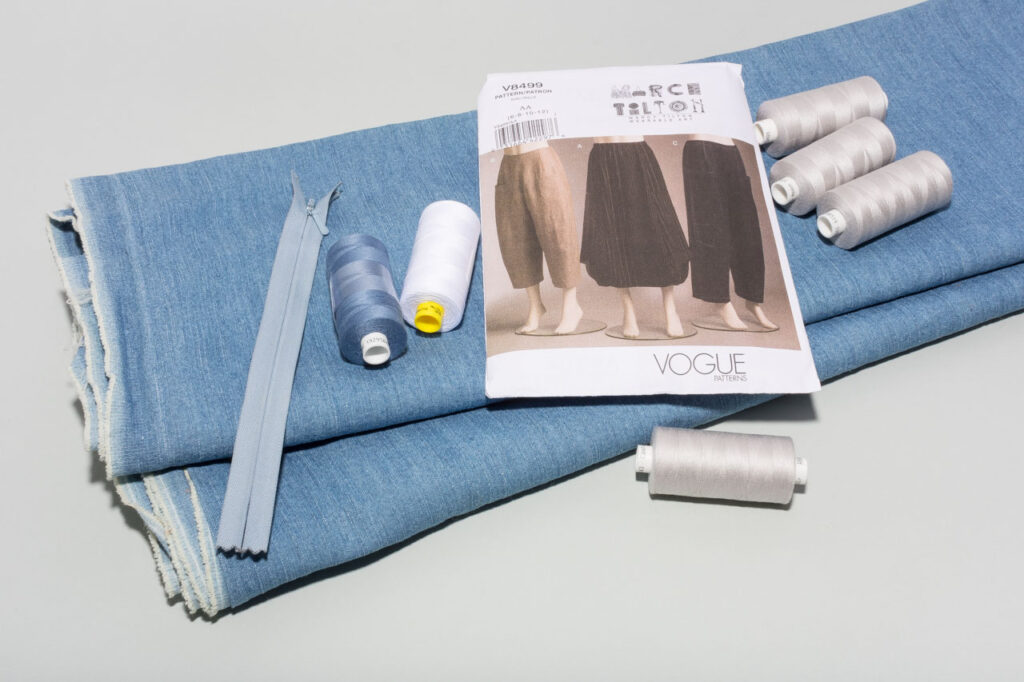
2. Gather Materials & Tools
Before starting, collect everything you need:
- Fabric – Select materials that match the look and function of your costume.
- Thread & Needles – Ensure you have the right type and match color.
- Notions & Embellishments – Zippers, buttons, lace, and trims as needed.
- Sewing Tools – Scissors, seam ripper, pins, measuring tape, and am functional iron.
3. Prepare & Cut the Fabric
- Pre-Wash Fabric – Prevent shrinkage and remove chemicals.
- Press Fabric – Iron out wrinkles for precise cutting.
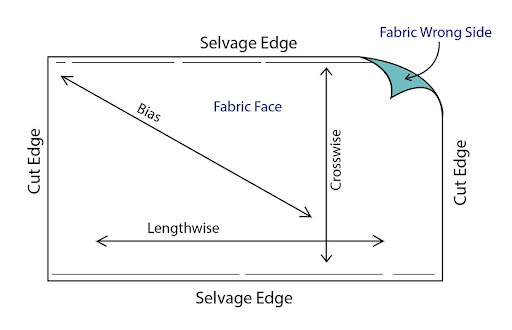
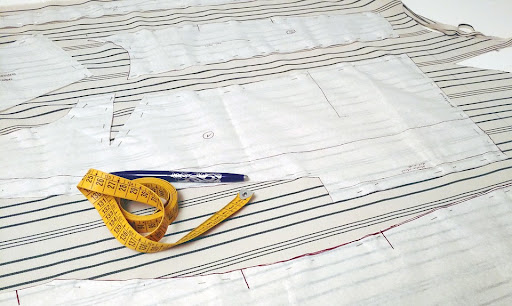
- Lay Out Pattern Pieces – Follow the grainline and layout guide.
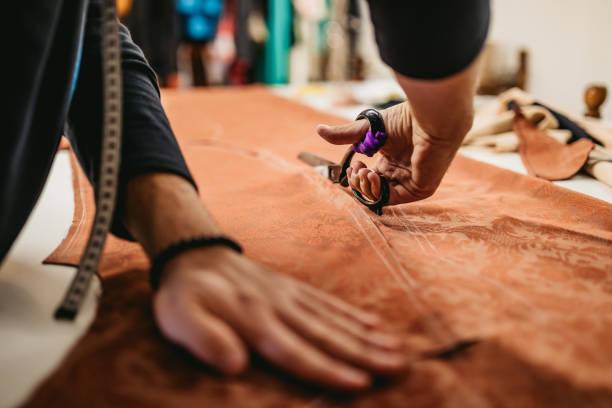
- Cut Carefully – Use sharp scissors or a rotary cutter for clean edges.
4. Mark & Assemble the Pieces
- Transfer Markings – Use chalk or fabric markers for darts, pleats, and notches.
- Pin or Clip Pieces Together – Ensure alignment before sewing.
- Baste First – Temporary stitches help test fit before final sewing – odd colors can be used for easy pull out later.
5. Sew the Seams & Structure the Costume
- Start with Major Seams – Sew bodices, skirts, or pants together first.
- Use Proper Stitching – Straight stitches for most seams, zigzag for stretch fabrics.
- Press Seams Open – Reduces bulk and gives a professional look.
- Reinforce Stress Points – Backstitch or use interfacing where required as per pattern instructions.
6. Add Finishing Touches
- Insert Fastenings – Add zippers, buttons, hooks, or velcro.
- Embellish as Needed – Apply trims, embroidery, or fabric paint.
- Hem Edges – Finish hems and edges for a clean, professional appearance.
7. Final Fitting & Adjustments
- Try on the Costume – Check for comfort, fit, and mobility.
- Make Alterations – Adjust seams, hems, or details as needed.
- Reinforce Weak Areas – Strengthen stitching if necessary.
8. Final Press & Wear with Confidence
- Iron One Last Time – Smooth out any wrinkles and set seams.
- Style & Accessorize – Complete the look with accessories.
- Enjoy Your Handmade Creation!
By following these steps, you’ll ensure a well-constructed costume that fits beautifully and holds up for your event. Happy sewing!
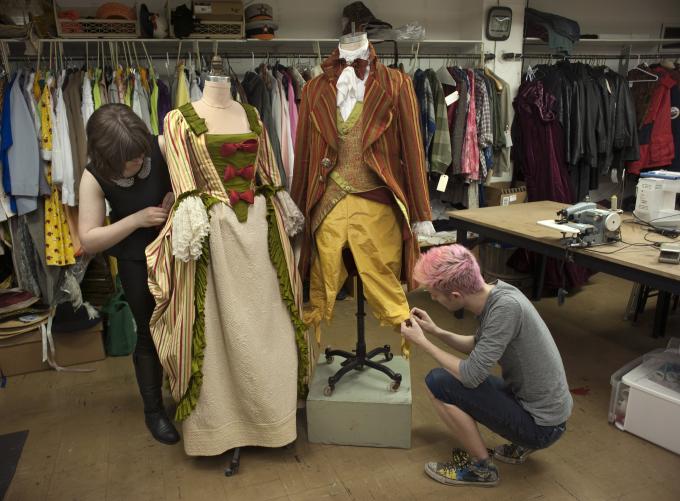
Authentic Details: Incorporating Period-Accurate Elements and Techniques
When creating a historically accurate costume, the small details make a big difference. From fabric choices to sewing techniques, every element contributes to the authenticity of your final piece. Here’s how to incorporate period-accurate elements and techniques to ensure historical accuracy in your handmade costume.
1. Research the Time Period
Before selecting materials and designs, study the era you’re recreating. Look at:
- Historical Portraits & Art – Paintings, sketches, and photographs from the period.
- Surviving Garments – Museum collections and historical costume archives.
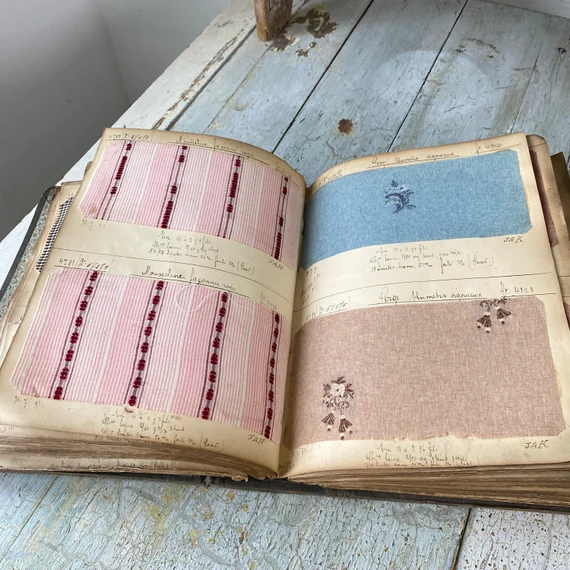
- Pattern Books & Documentation – Authentic sewing patterns and descriptions from the era.
2. Use Period-Appropriate Fabrics
The right fabric is key to achieving an authentic look:
- Natural Fibers – Cotton, linen, wool, and silk were commonly used.
- Avoid Modern Synthetics – Polyester and spandex did not exist in most historical periods.
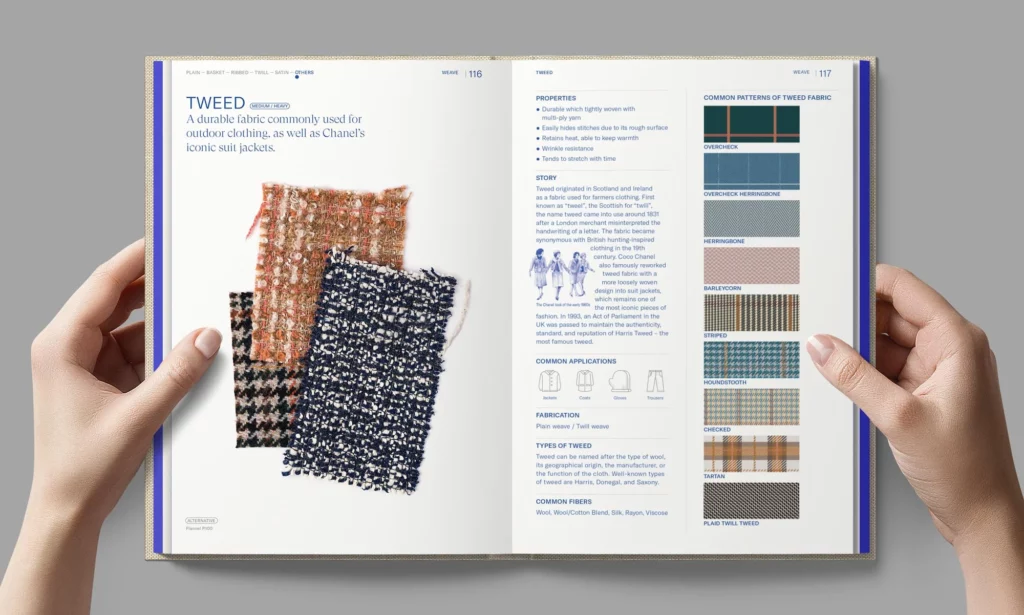
- Textile Patterns & Weaves – Research common prints and weaves used in the era.
3. Choose Historical Sewing Techniques
Different eras had distinct sewing methods:
- Hand-Sewing Stitches – Many historical garments were entirely hand-sewn.
- French Seams & Flat-Felled Seams – Used for durability before sergers existed.
- Period-Accurate Hemming – Blind stitching or rolled hems were common.
4. Use Era-Specific Fastenings
Closures and fastenings should match the time period:
- Hooks & Eyes, Lacing, or Buttons – Zippers were not widely used before the 20th century.
- Ties & Drawstrings – Often used for adjustments in fit.
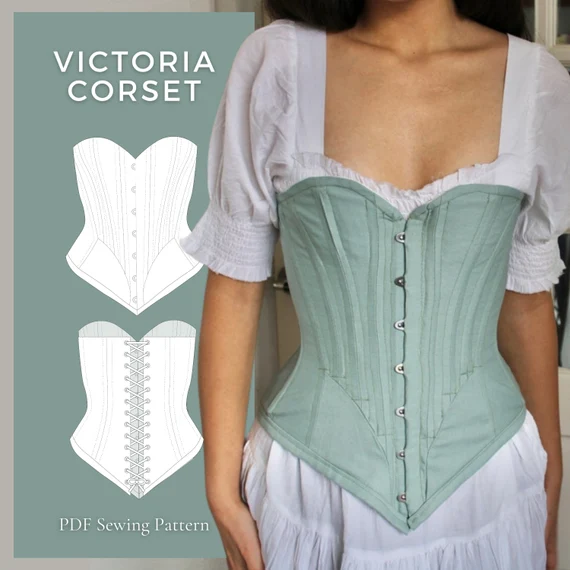
- Corsetry & Boning – Essential for structured garments like Victorian dresses.
5. Pay Attention to Silhouettes & Construction
Each period has a distinctive shape:
- Proper Undergarments – Corsets, petticoats, farthingales, or bustles to achieve the right form.
- Authentic Patterning – Draft or use reproduction patterns that reflect the era’s cuts and styles.
6. Incorporate Period-Accurate Embellishments
Decorative elements should align with historical techniques:
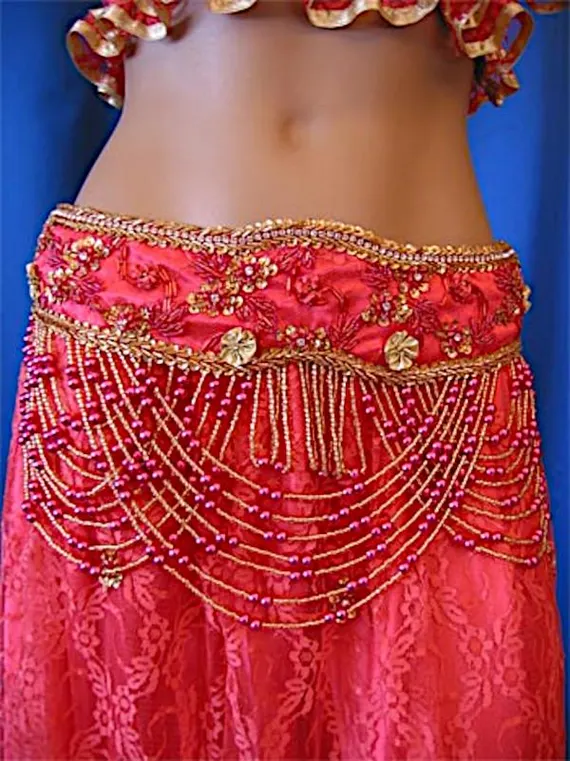
- Hand-Embroidery & Beading – Often used for decoration.
- Trim & Lace Styles – Match the available lacework and embroidery of the time.
- Natural Dyes & Aging Techniques – Use plant-based dyes or distressing methods to create a worn, period-accurate effect.
7. Final Touches: Styling & Accessories
Complete your look with:
- Authentic Footwear – Period-style shoes or boots.
- Hair & Headwear – Use wigs, bonnets, veils, or have your hair set in historically accurate hairstyles.
- Jewelry & Props – Stick to materials and styles that fit the era.
By focusing on these period-accurate details and techniques, you can create a truly authentic and historically immersive costume that reflects the craftsmanship and style of the past.
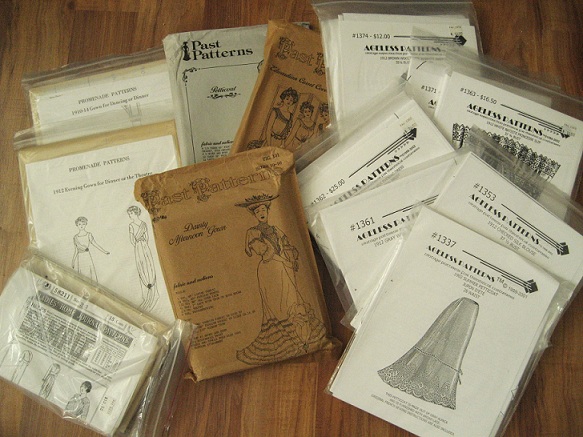
Sourcing Vintage or Reproduction Patterns: Where to Look for Ideas and Resources
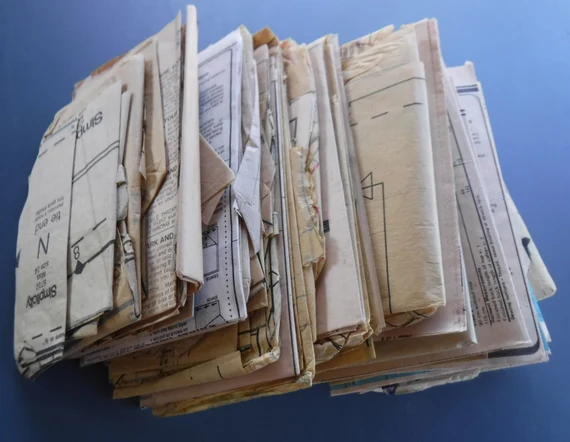
Finding the right pattern is essential for creating an authentic period costume or vintage-inspired outfit. Whether you’re looking for original vintage patterns or high-quality reproductions, there are numerous resources to explore. Here’s a guide on where to find patterns that suit your historical or retro sewing project.
*Online Marketplaces for Vintage Patterns
Many websites specialize in selling original vintage patterns:
- Etsy – A treasure trove of independent sellers offering authentic vintage and reproduction patterns. One of my favourites, as they don’t disappoint.
- eBay – A great place to find both rare and common vintage patterns from different eras.
- Ruby Lane – A curated selection of vintage patterns from trusted sellers.
- Facebook Marketplace & Buy/Sell Groups – Vintage sewing groups often have members selling patterns.
*Websites Specializing in Reproduction Patterns
For those seeking historically accurate reproductions:
- The Vintage Pattern Lending Library – Offers digitized versions of vintage sewing patterns. Research this is your own city.
- Folkwear Patterns – Specializes in ethnic and historical patterns from various periods.
- Reconstructing History – Provides highly detailed historical patterns for different time periods.
- Sense & Sensibility Patterns – Focuses on regency, Edwardian, and early 20th-century designs.
- Laughing Moon Mercantile – Offers Victorian, Edwardian, and Western-style sewing patterns.
*Free and Public Domain Pattern Resources
Some vintage patterns have been digitized and made available for free:
- The Antique Pattern Library – Features free sewing and embroidery patterns from historical archives. Keep in mind that fittings are usually small.
- The Commercial Pattern Archive (CoPA) – A collection of digitized patterns from the 19th and 20th centuries.
- VintageSewingPatterns.com – A searchable database of vintage sewing patterns with links to sources.
*Sewing Pattern Companies with Vintage Collections
Several major sewing brands offer vintage-inspired designs:
- Simplicity Vintage & Retro Collections – Re-releases classic patterns from the 1930’s–1970’s.
- Butterick Retro Collection – Features patterns from early and mid-20th century styles.
- McCall’s Archive Collection – A mix of retro and vintage-inspired sewing patterns.
- Vogue Vintage Patterns – High-fashion designs from the early to mid-20th century.
*Thrift Stores, Estate Sales & Antique Shops
Physical locations can also be a great place to find vintage patterns:
- Thrift Stores & Charity Shops – Occasionally carry old sewing patterns in craft sections.
- Estate Sales & Garage Sales – Often include sewing supplies from past decades.
- Antique Shops – May have vintage sewing books and patterns in stock.
*Libraries & Historical Costume Archives
Many libraries and museums have archives of historical patterns:
- University Costume Archives – Some university libraries have digital historical sewing resources.
- Local Libraries – May have vintage sewing books with patterns.
- Costume Museums – Some fashion museums offer sewing patterns based on historical garments.
By exploring these resources, you can find the perfect vintage or reproduction pattern to bring your historical costume or retro fashion project to life!
Tips for Beginners: Overcoming Common Challenges and Creating a Costume with Confidence
Creating a handmade costume can be a rewarding experience, but it can also be intimidating for beginners. From selecting fabrics to mastering sewing techniques, challenges can arise at any stage. Engage in an expert sewer (if you can) for advice and guidance along the way. Here are some practical tips to help you navigate common hurdles and build your confidence as you craft your first costume.
1. Start with a Simple Design
- Choose a costume that matches your skill level.
- Avoid complex patterns with intricate details if you’re new to sewing.
- Consider modifying an existing garment instead of starting from scratch.
2. Plan and Gather Materials in Advance
- Research and make a list of all necessary fabrics, threads, and embellishments.
- Buy a little extra fabric in case of mistakes.
- Choose easy-to-work-with fabrics like cotton before tackling more challenging materials like silk or velvet.
3. Practice Basic Sewing Skills
- Learn and practice straight stitching, hemming, and seam finishing.
- Try sewing small test pieces before working on your actual costume.
- Use a seam ripper to fix mistakes rather than stressing over perfection.
4. Follow Patterns and Instructions Carefully
- Read through the entire pattern before cutting or sewing.
- Mark important points on your fabric using chalk or fabric markers.
- Work step by step instead of rushing through the project. Allow plenty of time to create your costume, this will enable a perfect finish without the haste.
5. Fit and Adjust Along the Way
- Take accurate body measurements before cutting fabric.
- Pin pieces together and try them on before making permanent stitches.
- Don’t be afraid to make small adjustments to improve comfort and fit.
6. Learn to Troubleshoot Common Issues
- Uneven stitches? Check the thread tension on your sewing machine.
- Fabric puckering? Use the correct needle type and adjust stitch length.
- Costume not fitting right? Add darts, elastic, or gussets to improve fit.
7. Use the Right Tools for the Job
- Invest in sharp fabric scissors and quality thread.
- Have an iron and ironing board to press seams for a polished look.
- Use pins, clips, and a measuring tape to keep fabric in place.
8. Take Breaks and Be Patient
- Sewing can be time-consuming, so pace yourself to avoid frustration.
- If a mistake happens, step away for a bit before fixing it.
- Enjoy the creative process instead of aiming for absolute perfection.
9. Test Your Costume Before the Event
- Move around in the costume to ensure it’s comfortable and durable.
- Make any last-minute adjustments to improve wear-a-bility.
- Check for any loose threads, unfinished hems, or needed reinforcements.
10. Have Fun and Be Proud of Your Work!
- Every costume, even with imperfections, is a reflection of your creativity and effort.
- Celebrate your progress and keep learning for future projects.
- Wear your costume with confidence and enjoy the experience!
By following these beginner-friendly tips, you can overcome common sewing challenges and create a costume that you’re proud to wear. Happy sewing!

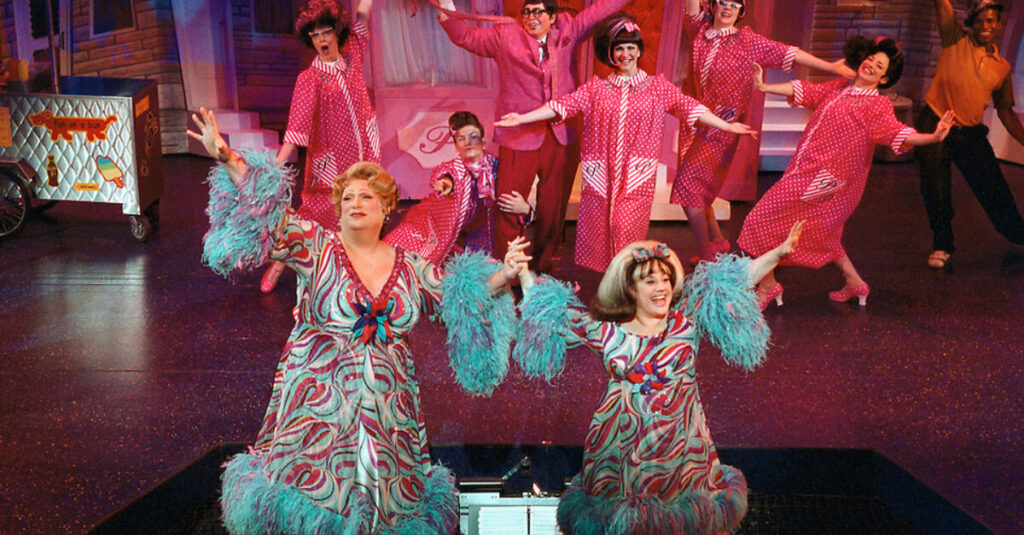
Showcasing Your Creation: Ideas for Vintage Costume Events and Gatherings
Once you’ve completed your handmade vintage or historically inspired costume, it’s time to showcase your work! Whether you want to participate in themed events, historical reenactments, or social gatherings, there are plenty of opportunities to display your craftsmanship. Here are some ideas for events and gatherings where you can wear and celebrate your vintage costume.
#Historical Reenactments and Festivals
- Many historical societies host reenactments that require period-accurate costumes.
- Events range from medieval fairs to Civil War reenactments and Victorian-era gatherings.
- Check local and national organizations for upcoming reenactment opportunities.
#Vintage-Themed Social Events
- Attend speakeasy nights or 1920’s jazz-age parties to show off Roaring Twenties attire.
- Swing dance events often encourage 1940’s and 1950’s fashion.
- Look for steampunk or Victorian/Edwardian tea parties for a mix of history and fantasy.
#Costume and Cosplay Conventions
- Many conventions, such as Comic-Con and historical cosplay events, welcome period costumes.
- Participate in costume contests to gain recognition for your sewing and design skills.
- Connect with fellow enthusiasts and learn from other costume makers.
#Themed Photo Shoots
- Arrange a professional or DIY photo shoot in a historically appropriate location.
- Collaborate with photographers who specialize in vintage or period photography.
- Use social media to share your costume with a wider audience.
#Theatrical and Film Opportunities
- Local theater productions often seek volunteers or actors with historical costumes.
- Independent filmmakers and student film projects may need costumed extras.
- Offer your costume for rental or loan to historical drama productions.
#Museum and Educational Events
- Many museums hold period-themed exhibits or living history events.
- Volunteer as a historical interpreter to educate others while wearing your costume.
- Check with local historical societies for potential showcase opportunities.
#Renaissance and Fantasy Fairs
- Renaissance fairs provide a great opportunity for medieval, Elizabethan, or fantasy costumes. Bridgerton is one that comes to mind.
- Many fairs host costume contests and role-playing experiences.
- LARP (Live Action Role-Playing) events also allow for creative and historical costume displays.
#Weddings and Formal Gatherings
- Some couples host historical or vintage-themed weddings where guests dress in period attire.
- Victorian balls or Gatsby-style parties are excellent places to wear vintage costumes.
- Look for charity galas with historical themes.
#Online Communities and Competitions
- Share your work in vintage and historical costume Facebook groups, such as The Late Victorian Society.
- Participate in online contests hosted by sewing and costume communities.
- Join forums where historical costume makers exchange tips and showcase their work.
#Hosting Your Own Event
- Organize a themed dinner party where guests dress in period attire.
- Host a small vintage picnic or tea party in a scenic outdoor setting.
- Start or join a local historic costume group for meetups and gatherings with like-minded people.
No matter where you choose to showcase your vintage costume, the most important thing is to enjoy wearing it and sharing your passion with others. Every event is a chance to celebrate craftsmanship, history, and creativity!
Thanks for reading my recent post on costume making – hope you got a few tips on where and how to start? Any comments can be forwarded below, or you can follow us on our socials.
Regards Helen
https://www.facebook.com/vintageclothesandaccessoriesaustralia
Wow, I thoroughly enjoyed this article! As someone who has always loved vintage fashion, reading through the eras and seeing how each aesthetic was broken down brought such a sense of nostalgia—especially the fabric and pattern discussions. It instantly took me back to afternoons spent with my grandma at the fabric store, poring over pattern books and running our fingers over bolts of cloth.
Your article was both informative and beautifully presented. I especially appreciated the attention to detail—from outlining the essential tools to offering beginner tips and historical insights. There were so many thoughtful touches I hadn’t considered, like the importance of period-accurate closures or the difference fabric types can make in silhouette and authenticity.
Thank you for such a well-researched and visually inspiring piece. I’ll definitely be keeping an eye out for more of your writing. It’s a great blend of practical advice and creative encouragement—perfect for anyone looking to dive into vintage costume making.
~JarieLyn~
Thanks Jarielyn, I appreciate all your comments. My husband and myself are members of the Late Victorian Society here in Melbourne and I love to create new costumes for different events coming up. I have made to date, Titanic dress and overdress, Gatsby dress and Victorian overdress. You can follow me on my socials if you like – Vintage Clothes and Accessories Australia on Facebook and Vintage Clothes and Accessories on Instagram.
Regards Helen.